How to Make a Handcrafted Pen
If you like the look and feel of fine polished woods and take pride and satisfaction in creating a beautiful project – then pen rafting is for you! Pen making is easy, requires a minimum of equipment, and produces a beautiful finished product in minutes. Just follow our simple guidelines and soon you’ll be turning elegant wooden pens and pencils.
1) You’ll Need a Lathe to Turn Your Pen Project
 The modern mini and midi style lathes are ideal for turning pens and other small projects. Variable speed is a plus for fine tuning the lathe speeds when turning and finish- ing pen projects.
The Carba-Tec™ is a great choice for a full featured variable speed mini lathe. Consider the TurncrafterPlus™ for economy in a mini lathe and the TurncrafterPro™ for larger and longer projects. See lathe selections.
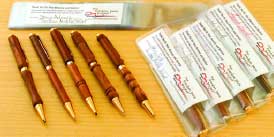
2) What is in a Pen Kit?
 A pen kit includes all of the parts, mechanisms, tubes, and refills that get assembled to make your pen (does not include the wood). The PSI’s “Slimline” Pen kit is a favorite with beginners. Exposed pen kit parts have finishes available in 24kt gold-plate, black enamel, brushed satin, and platinum that give different looks to each finished pen. The pen tubes are central to the pen assembly and have different diameters to accommodate different style pen components. The most common tube diameters are 7mm, 3/8", 8mm and 10mm.
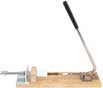
3) Select and Drill the Wood for Your Project
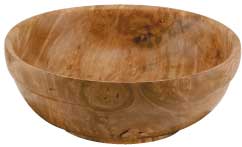
 The most impressive pens use fine grained tropical exotic or burled hard woods with good color definition. Stabilized, laminated, and acrylic styles are also a popular choice since they coordinate well with the specific tone of gold, black, or satin pen components. Pre-cut, pre-turned, and pre-drilled pen blanks are available to simplify and speed up the glue-up and turning processes. Drilling the appropriate hole in a pen blank is expedited by using a drill press and a vise that holds the blank vertically.
4) Glue Up and Square Your Pen Blanks
 Two-part epoxy glue is a good choice for gluing the pen tubes into the drilled wood blanks. Make sure the tubes are well covered with glue and dry completely before turning. The glued-up blanks should be squared with the appropriate PSI barrel trimmer that gives a nice square surface for a good fit with your pen parts.
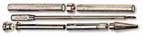
5) Mount the Blanks on a Mandrel for Turning
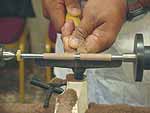
 The pen mandrel mounts between the lathe’s headstock and tailstock. The pen tubes with glued-up wood are separated and aligned with the pen bushings and slide onto the mandrel. Mandrels are available for various lathe headstock styles. The pen bushings serve two purposes. They indicate the final diameter of the wood on the pen tubes and they have steps to mount larger diameter tubes onto the mandrel. Every pen kit requires a specific set of appropriate bushings but all kits are turned on the basic pen mandrel.
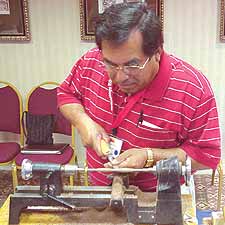
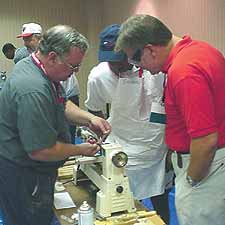
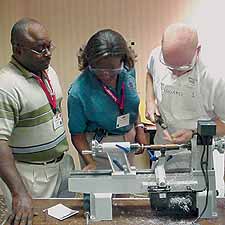
6) Turn the Pen Blanks with a Lathe Chisel
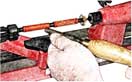 Start turning with a spindle gouge at a higher speed to break the corners of the blank. Reduce the speed and continue turning the blanks down close to the bushing diameter. Use skew chisel for final turning to bring the wood to a nice smooth finish.
7) Sanding and Finishing
 Sand with graduated grits starting at about 150 grit. Continue with 220, 320 etc. up to the finest grit you have available (400 minimum). Specialized abrasives (EEE polish and Micro Mesh) are available for super-fine finishing. The final finishing brings your project to a dramatic conclusion with one of PSI’s waxes,lacquers, or polishes. Select Shellawax™ friction polish for a finish that dries instantly on the lathe and produces a wonderfully brilliant shine in just seconds.
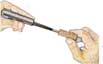
8) Assemble your Pen Project
 The parts from your pen kit will now press and assemble into the turned pen barrels. The nib, clip, mechanism and band will all press together for a perfectly finished pen. Every pen kit includes complete instructions to guide you through the turning, assembly and finishing process.
9) Need More Information?
Refer to an instructional book, VHS tape, DVD, visit our website, or call and speak to one of our pen making expert technicians. We are committed to making you a successful pen crafter!
 The freedom pen project was created by the Saw Mill Creek Woodworker’s forum to provide hand made pens for our military stationed in foreign countries. The goal of the project is for every freedom pen to serve as a constant reminder to our troops that they are not alone and that they have our continuing support.
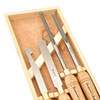 We recommend a HSS (High Speed Steel) roughing gouge, skew chisel, bowl gouge, and a scraper. Make sure your tools are sharp. Dull tools can tear out the grain and ruin projects. Include a 2" Forstner bit (or a bit that matches your lathe chuck’s jaws) to drill a mounting hole for your lathe chuck.
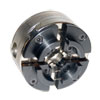 Use a good quality self-centering chuck system with round jaws that can grip either outside or inside. A set of flat (jumbo) jaws will make final finishing easier.
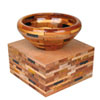 Don’t cut down a tree yet! The easy way to start is using one of our pre-dried bowl blanks for a fast and easy start. One of our 2"x 5"x 5"or 2"x 6"x 6"wood blanks is a great starting point,especially if you have a mini or midi lathe.
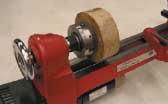 Mark the blank corner to corner. Then draw a circle to the approximate outside diameter of your bowl.
 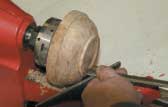 Start by using a roughing gouge, begin at the base of the bowl where most of the wood will be removed and work towards the rim. Keep your drawing nearby and continue shaping the outside surface using a bowl gouge and skew to duplicate your profile. You will be turning the bowl around to turn the inside next but first turn a spigot for an outside grip (turn a recessed hole for an inside grip) on the chuck.
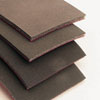 Use graduated grits to smooth and sand the outside surface. Polish the surface with a finish of your choice. Shellawax liquid is an excellent choice. A food safe polish will have to used if the bowl is going to be used for food.
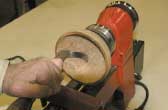 Remove the blank from the chuck and reverse it. Use the chuck jaws to grab the turned spigot (or insert into the hole) to secure the blank. Tighten the bowl in the chuck. Again hand turn the blank to test for wobbling and alignment. Make any adjustments as necessary before starting the inside surface.