North Penn High School – Lansdale, PA
July 11th, 2008
How to make a Pen |
||
 Featured on this page is Greg Lobko, a student at North Penn High School, Lansdale, PA, demonstrating the steps on how to make a wood pen using Penn State Industries products. We would like to thank his woodshop teacher, Bill Michael, for taking and sending us these photographs. |
 |
|
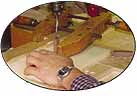
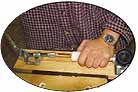
| Step 1 – Cut & Drill Wood Blanks. Cut blanks to the length of the tube plus 1/16". Drill a centered hole through each blank. |
||
 |
 |
|
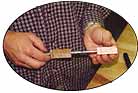
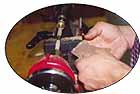
| Step 2 – Glue the Tubes into the Blanks. Spread the glue on the tube. Insert the blank with a twisting motion to spread glue evenly inside. Allow to dry. |
||
 |
 |
 |
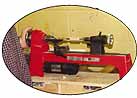
| Step 3 – Turning The Blanks. Set up the lathe according to manufacturer’s directions. Using chisels turn blanks to desired diameter. |
||
 |
 |
 |
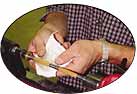
| Step 4 – Sand. As with any sanding, progress through a range of grits |
Step 5 – Finish. Try a finish of your choice, for example, PSI Liquid Friction Polish. |
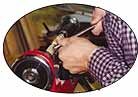
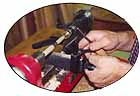
Step 6 – Assembly. Use a clamp, vise or Project Assembly Press to press parts together. |
|
Greg’s finished pen |
||
